PhoneGap Library
Disclaimer: This is an open source library, which means you are free to download and customize the library functions based on your specific application needs.
Download SDK
The PhoneGap SDK and demo project can be found here.
Configure your Account
Make the following changes in the LoginRadius Admin Console:
1. Under Branding > Email Templates, add an apikey parameter to the default links in the Verification Email and Forgot Password Email Templates.
Verification Email Template: #Url#?vtype=emailverification&vtoken=#GUID#&apikey=<YOUR_LOGINRADIUS_APIKEY>
Forgot Password Email Template: #Url#?vtype=reset&vtoken=#GUID#&apikey=<YOUR_LOGINRADIUS_APIKEY>
2. Generate an PhoneGap SOTT under Tenant settings > SOTT (Mobile App). Set the token's valid date range according to your requirements.
Installation
1. Download a copy of LoginRadiusPhoneGapSDK.js from the PhoneGap SDK and include the following scripts in your project:
<script src="js/LoginRadiusPhoneGapSDK.js"></script>
<script src="https://auth.lrcontent.com/v2/LoginRadiusV2.js"></script>
2. Follow Apache Cordova's documentation to install the Apache Cordova InAppBrowser in your current project:
cordova plugin add cordova-plugin-inappbrowser
Note: If you're using Cordova 4.0.0 or higher, you must install the Apache Cordova Whitelist in order to make network requests. Please follow Cordova's installation documentation.
cordova plugin add cordova-plugin-whitelist
3. Initialize a LoginRadius object before onLoad.
var commonOptions = {};
commonOptions.apiKey = "<YOUR_LOGINRADIUS_APIKEY>";
commonOptions.appName = "<YOUR_LOGINRADIUS_APPNAME>";
commonOptions.hashTemplate = true;
commonOptions.accessTokenResponse = true;
commonOptions.phoneLogin = false;
commonOptions.sott ="<YOUR_GENERATED_SOTT>";
commonOptions.verificationUrl = "https://auth.lrcontent.com/mobile/verification/index.html";
commonOptions.callbackUrl = "<YOUR_PHONEGAP_APP_NAME>://";
commonOptions.isMobile =true;
commonOptions.formValidationMessage=true;
commonOptions.instantLinkLogin = true;
commonOptions.smartLoginPingCount = <any number>; //default is 100 times
commonOptions.smartLoginPingInterval = <any number>; //default is 5 second
commonOptions.smartLoginEmailTemplate = <Email template>
commonOptions.smartLoginRedirectUrl = <Redirect Url>
commonOptions.projectionFields = {"login":["Profile","access_token"]};
commonOptions.usernameLogin = true;
var LRObject= new LoginRadiusV2(commonOptions);
You can find your PhoneGap app name in your config.xml file as the "Name" field.
For Single Page Apps, initialize the LoginRadius callback object before onDeviceReady. For Multipage Apps, initialize the LoginRadius callback object in onDeviceReady:
var options = {};

//Initialize the function that will handle the responses from the Loginradius APIs.
options.callback = function(params) {
    //Handle the actions for: sociallogin, login, registration, and forgotpassword
    switch (params.action) {
        //Social login returns an accesstoken which can be used to pull user details for APIs calls.
        case "sociallogin":
            //handle Social functionality
            break;
            //Login returns an accesstoken which can be used to pull user details for APIs calls.
        case "login":
            //handle Email and Password Functionality
            break;
            //Registration returns an email message and status which you can use to display messages to your user.
        case "registration":
            //Handle successful registration messaging
            break;
            //Forgot password returns an email message and status which you can use to display messages to your user.
        case "forgotpassword":
            //Handle Forgot password messaging
            break;
        default:
            alert('action not defined');
            break;
    }
};
//Initialize the LoginRadius PhoneGap SDK object
$LR.init(options);
The above initialization requires an options object with the following parameters:
| Name | Description | Required |
|---|---|---|
| apiKey | Your LoginRadius API Key | Yes |
| appName | Your LoginRadius [App Name] | Yes |
| sott | A Secure One-Time Token | Yes |
| verificationUrl | A dynamic URL for email verification Default: https://auth.lrcontent.com/mobile/verification/index.html | Yes |
| forgotPasswordUrl | A dynamic URL for resetting a password | Yes |
| formValidationMessage | true: Shows form validation message just below the form elements false: No form validation message | Yes |
| callbackUrl | Your PhoneGap app name. For example: ExampleApp://. Whitelist your callbackUrl in the Tenant settings > Configured Domains. | Yes |
| passwordLength | Your password length. For example: {min : 10, max :32} | Recommend |
| promptPasswordOnSocialLogin | true: Prompt a user to set a password after having already authenticated via Social Login. This creates 2 customer profiles. | No |
| usernameLogin | true: Enables users to login with either username or email. | No |
| phoneLogin | true: Enables login by phone number. Contact LoginRadius Support to enable this feature | No |
| smsTemplate | SMS template name | No |
| resetPasswordEmailTemplate | Reset Password template name | No |
| forgotPasswordTemplate | Forgot Password template name | No |
| smsTemplatePhoneVerification | Phone Number Verification template Name | No |
| instantLinkLogin | true: Enables Instant Link login | No |
| smartLoginPingCount | Number:Ping count for Smart Login | No |
| smartLoginPingInterval | Number: Time interval between successive pings for Smart Login | No |
| smartLoginEmailTemplate | Email template name for Smart Login | No |
| smartLoginRedirectUrl | Redirect URL for Smart Login | No |
| projectionFields | Array of values for fetching selected fields, where key is action and value is array of fields | No |
4. Initialize the LoginRadius PhoneGap SDK object:
$LR.init(options);
Actions
The object passed to the callback function contains useful fields including the action triggering the callback.
| Action Name | Contents |
|---|---|
| login | token: The LoginRadius Access Token status: Boolean indicating whether login was successful |
| sociallogin | token: The LoginRadius Access Token status: Boolean indicating whether login was successful |
| registration | email: The email used during registration. status: Boolean indicating whether registration was successful |
| forgotpassword | email: The email used during password reset. status: Boolean indicating whether the password was reset successfully |
Activation
Finally, setup elements to trigger the functions that will direct your users to the relevant hosted interfaces.
Login
Trigger: $LR.util.lrLogin();
Description: Triggers the Login interface and returns a "login" action to the callback function.
To render the Traditional Login interface, add the following:
<div id="login-container"></div>
For Social and Traditional Login interfaces on the same page, add the following:
<div id="interfacecontainerdiv" class="interfacecontainerdiv" style="text-align: center;"></div>
<div id="sociallogin-container"></div>
<script type="text/html" id="loginradiuscustom_tmpl">
<a class="lr-provider-label" href="javascript:void(0)" onclick="return <#=ObjectName#>.util.openWindow('<#= Endpoint #>');" title="<#= Name #>" alt="Sign in with <#=Name#>">
<#=Name#>
</a>
</script>
<div id="login-container"></div>
Social Login
Trigger: $LR.util.lrSocial();
Description: Triggers the Social Login interface and returns a "sociallogin" action to the callback function.
To render the Social Login interface, add the following:
<div id="interfacecontainerdiv" class="interfacecontainerdiv" style="text-align: center;" ></div>
<div id="sociallogin-container"></div>
<script type="text/html" id="loginradiuscustom_tmpl">
<a class="lr-provider-label" href="javascript:void(0)" onclick="return <#=ObjectName#>.util.openWindow('<#= Endpoint #>');" title="<#= Name #>" alt="Sign in with <#=Name#>">
<#=Name#>
</a>
</script>
</div>
Registration
Trigger: $LR.util.lrRegister();
Description: Triggers the Registration interface and returns a "registration" action to the callback function.
To render the Registration interface, add the following:
<div id="registration-container"></div>
Forgot Password
Trigger: $LR.util.lrForgotPassword();
Description: Triggers the Forgot Password interface and returns a "forgotpassword" action to the callback function.
To render the Forgot Password interface, add the following:
<div id="forgotpassword-container"></div>
Smart Login
Trigger: $LR.util.lrSmartLogin();
Description: Triggers the Smar Login interface and returns an "smartLogin" action to the callback function.
To render the Smar Login interface, add the following:
<div id="smartLogin-container"></div>
OneTouch Login
Trigger: $LR.util.lrOneTouchLogin();
Description: Triggers the OneTouch Login interface and returns a "onetouchLogin" action to the callback function.
To render the OneTouch Login interface, add the following:
<div id="onetouchLogin-container"></div>
Reset Password by Security Questions
Trigger: $LR.util.lrResetPasswordBySecurityQuestions();
Description: Triggers the Reset Password by Security Questions interface and returns a "resetpasswordbysecurityquestions" action to the callback function.
To render the Reset Password by Security Questions interface, add the following:
<div id="resetPasswordBySecQ-container"></div>
Handling Actions
In the demo project, refer to index.html for how to handle actions in order manage the access token, redirect customers, and display warning messages.
var options = {};
//Initialize the function that will handle the responses from the Loginradius APIs.
options.callback = function(params) {

    //Handle the all actions
    switch (params.action) {
     //Social login returns an accesstoken which can be used to pull user details for APIs calls.
     case "sociallogin":
         if (params.success != null) {
             if (params.success.access_token != null) {
                 sessionStorage.setItem('LRTokenKey', params.success.access_token);
                 window.location = "#after_loginredirect";
             } else {
                 // alert(JSON.stringify(params.success));
             }
         } else if (params.errors != null) {
             alert(JSON.stringify(params.errors));
         }
         break;
         //Login returns an accesstoken which can be used to pull user details for APIs calls.
     case "login":
         if (params.success != null) {
             if (params.success.access_token != null) {
                 sessionStorage.setItem('LRTokenKey', params.success.access_token);
                 window.location = "#after_loginredirect";
             } else {

             }
         } else if (params.errors != null) {
             alert(JSON.stringify(params.errors));
         }
         break;
         //Registration returns and email message and status which you can use to display messaging to your user.
     case "registration":
         if (params.success != null) {
             alert(JSON.stringify(params.success));
         } else if (params.errors != null) {
             alert(JSON.stringify(params.errors));
         }
         break;
         //Forgot password returns and email message and status which you can use to display messaging to your user.
     case "forgotpassword":
         if (params.success != null) {
             alert(JSON.stringify(params.success));
         } else if (params.errors != null) {
             alert(JSON.stringify(params.errors));
         }
         break;
         //Account linking returns response which you can use to display messaging to your user.
     case "accountlinking":
         if (params.success != null) {
             alert(JSON.stringify(params.success));
             linkSocialAccount();
         } else if (params.errors != null) {
             alert(JSON.stringify(params.errors));
         }
         break;
         //Update Profile returns response which you can use to display messaging to your user.
     case "updateprofile":
         if (params.success != null) {
             alert(JSON.stringify(params.success));
         } else if (params.errors != null) {
             for (var i = 0; i < params.errors.length; i++) {
                 // alert(params.errors[i].Description);
                 if (params.errors[i].ErrorCode == "905") {

                 } else {
                     alert(JSON.stringify(params.errors));
                 }
             }
         }
         break;
         //Change Username returns response which you can use to display messaging to your user.
     case "changeusername":
         if (params.success != null) {
             alert(JSON.stringify(params.success));
         } else if (params.errors != null) {
             alert(JSON.stringify(params.errors));
         }
         break;
         //Add Email returns response which you can use to display messaging to your user.
     case "addemail":
         if (params.success != null) {
             alert(JSON.stringify(params.success));
         } else if (params.errors != null) {
             alert(JSON.stringify(params.errors));
         }
         break;
         //Remove Email returns response which you can use to display messaging to your user.
     case "removeemail":
         if (params.success != null) {
             alert(JSON.stringify(params.success));
         } else if (params.errors != null) {
             alert(JSON.stringify(params.errors));
         }
         break;
         //Update Phone returns response which you can use to display messaging to your user.
     case "updatephone":
         if (params.success != null) {
             alert(JSON.stringify(params.success));
         } else if (params.errors != null) {
             alert(JSON.stringify(params.errors));
         }
         break;
         //Change password returns response which you can use to display messaging to your user.
     case "changepassword":
         if (params.success != null) {
             alert(JSON.stringify(params.success));
         } else if (params.errors != null) {
             alert(JSON.stringify(params.errors));
         }
         break;
	 case "simplifiedregistration":
		 if (params.success != null) {
             if (params.success.access_token != null) {
                 sessionStorage.setItem('LRTokenKey', params.success.access_token);
                 window.location = "#after_loginredirect";

             } else {
				 alert("Please check your email");
             }
         } else {
             alert(JSON.stringify(params.errors));
         }
		 break;
	 case "autologin":
		 if (params.success != null) {
             if (params.success.access_token != null) {
                 sessionStorage.setItem('LRTokenKey', params.success.access_token);
                 window.location = "#after_loginredirect";

             } else {

             }
         } else {
             alert(JSON.stringify(params.errors));
         }
		 break;
	 case "resetpasswordbysecurityquestions":
		 if(params.errors!=null){
			 alert(JSON.stringify(params.errors));
		 }
		 break;
     default:
         break;
 }
 };
 //Initialize the LoginRadius PhoneGap SDK object

$LR.init(options);
};
UserProfile
In the demo project, refer to Profile.html for how to render a user's profile data.
 <body>
  <!--Show the user's profile after Login -->
  <div class="sociallogin_userprofile" id="sociallogin_userprofile">
    <table border="0">
      <tr>
        <td class="userprofile_label" colspan="2"><img id="userimage" height="150px;" alt="profile_image" />
          <span style="text-align:right;float:right;vertical-align: top;border: 0;">
          <a class="" href="#" onclick="Logout();" style="border:0;color:#9095AA">Logout</a>
          </span>
        </td>
      </tr>
      <tr>
        <td class="userprofile_label">ID</td>
        <td id="ID" class="userprofile_value"></td>
      </tr>
      <tr>
        <td class="userprofile_label">Provider</td>
        <td id="Provider" class="userprofile_value"></td>
      </tr>
      <tr>
        <td class="userprofile_label">Name</td>
        <td id="username" class="userprofile_value"></td>
      </tr>
      <tr>
        <td class="userprofile_label">EmailID</td>
        <td id="emailid" class="userprofile_value"></td>
      </tr>
      <tr>
        <td class="userprofile_label">Birth Date</td>
        <td id="birthdate" class="userprofile_value"></td>
      </tr>
      <tr>
        <td class="userprofile_label">Gender</td>
        <td id="gender" class="userprofile_value"></td>
      </tr>
      <tr>
        <td class="userprofile_label">Profile Url</td>
        <td id="profileurl" class="userprofile_value"></td>
      </tr>
    </table>
  </div>
  <!-- Scripts for LoginRadius. We need the HTML 5 SDK and the PhoneGap SDK -->
  <script src="js/LoginRadiusSDK.2.0.0.js"></script>
  <!-- Custom Scripts -->
  <script type="text/javascript" charset="utf-8">
    //Logout cleanup
    function Logout() {
        sessionStorage.removeItem('LRTokenKey');
        window.location = "index.html";
    }

    //Device APIs are available
    window.onload = function() {
        var token = LoginRadiusSDK.getToken();

        //Don't rely on the token for any sensitive transactions, only for getting data.
        if (token) {
            loadUserprofile();
        } else {
            window.location.href = "index.html";
        }

        //Invoke the user profile API from the HTML 5 SDK.
        function loadUserprofile() {
            LoginRadiusSDK.getUserprofile(function(userprofile) {
                document.getElementById('sociallogin_userprofile').style.display = "block";
                document.getElementById('userimage').src = userprofile.ImageUrl;
                document.getElementById('ID').innerHTML = userprofile.ID;
                document.getElementById('Provider').innerHTML = userprofile.Provider;
                document.getElementById('username').innerHTML = (userprofile.FirstName || '') + ' ' + (userprofile.MiddleName || '') + ' ' + (userprofile.LastName || '');
                document.getElementById('emailid').innerHTML = userprofile.Email && userprofile.Email.length > 0 ? userprofile.Email[0].Value : '';
                document.getElementById('birthdate').innerHTML = userprofile.BirthDate;
                document.getElementById('gender').innerHTML = userprofile.Gender;
                document.getElementById('profileurl').innerHTML = userprofile.ProfileUrl;
            });
        }
    }
  </script>
</body>
Account Linking
Trigger: $LR.util.lrAccountLink();
Description: Triggers the Account Linking interface after successful login.
To render the Account Linking interface, add the following:
<div id="interfacecontainerdiv_link" class="interfacecontainerdiv_link"></div>
<script type="text/html" id="loginradiuscustom_tmpl_link">
<# if(isLinked) { #>
 <div class="lr-linked">
<a class="lr-provider-label" href="javascript:void(0)" title="<#= Name #>" alt="Connected">
<#=Name#> is connected
</a>
<a  onclick='return  <#=ObjectName#>.util.unLinkAccount(\"<#= Name.toLowerCase() #>\",\"<#= providerId #>\")'>delete</a>
</div>
<# }  else {#>
 <div class="lr-unlinked">
<a class="lr-provider-label" href="javascript:void(0)" onclick="return  <#=ObjectName#>.util.openWindow('<#= Endpoint #>');" title="<#= Name #>" alt="Sign in with <#=Name#>">
<#=Name#></a>    </div>
  <# } #>
</script>
Profile Update
Trigger:$LR.util.lrProfileUpdate();
Description: Triggers the Profile Update interface after successful login.
To render the Profile Update interface, add the following:
<div id="profileeditor-container"></div>
Change Password
Trigger: $LR.util.lrChangePassword();
Description: Triggers the Change Password interface after successful login.
To render the Change Password interface, add the following:
<div id="changepassword-container"></div>
Update Phone
Trigger: $LR.util.lrUpdatePhone();
Description: Triggers the Update Phone interface after successful login.
To render the Update Phone interface, add the following:
<div id="updatephone-container"></div>
Add Email
Trigger: $LR.util.lrAddEmail();
Description: Triggers the Add Email interface after successful login.
To render the Add Email interface, add the following:
<div id="addemail-container"></div>
Remove Email
Trigger: $LR.util.lrRemoveEmail();
Description: Triggers the Remove Email interface after successful login.
To render the Remove Email interface, add the following:
<div id="removeemail-container"></div>
Change Username
Trigger: $LR.util.lrChangeUsername();
Description: Triggers the Change Username interface after successful login.
To render the Change Username interface, add the following:
<div id="changeusername-container"></div>
Advanced Options
Phone Login
Enable Phone Login in the commonOptions object before onLoad.
commonOptions.phoneLogin = true;
Native Login
Supported Devices
Native Login is currently supported in Facebook, Google, and VKontakte in our Android and iOS SDKs.
Facebook Native Login
To enable Native Login in Facebook, install the Apache Cordova Facebook Plugin into your project.
It is highly recommended to follow the iOS installation guide and the Android installation guide.
Then, enable Native Login in your options object by setting the following:
//Enable native login if available.
options.facebookNative = true;
Facebook Configuration for Facebook Native Login
Create a new Facebook App on the Facebook Developers site.
Android
Create a Development Key Hash
Facebook uses the key hash to authenticate interactions between your app and the Facebook app. If you run apps that use Facebook Login, you need to add your Android development key hash to your Facebook developer profile.
Add this code under the activity onCreate and replace the placeholder with your package name. Running this code will generate your key hash and output it to your logs.
try {
       PackageInfo info = getPackageManager().getPackageInfo(
               "YOUR_ACTIVITY_PACKAGE_NAME",
               PackageManager.GET_SIGNATURES);
       for (Signature signature : info.signatures) {
           MessageDigest md = MessageDigest.getInstance("SHA");
           md.update(signature.toByteArray());
           Log.d("KeyHash:", Base64.encodeToString(md.digest(), Base64.DEFAULT));
           }
   } catch (NameNotFoundException e) {
   } catch (NoSuchAlgorithmException e) {
   }
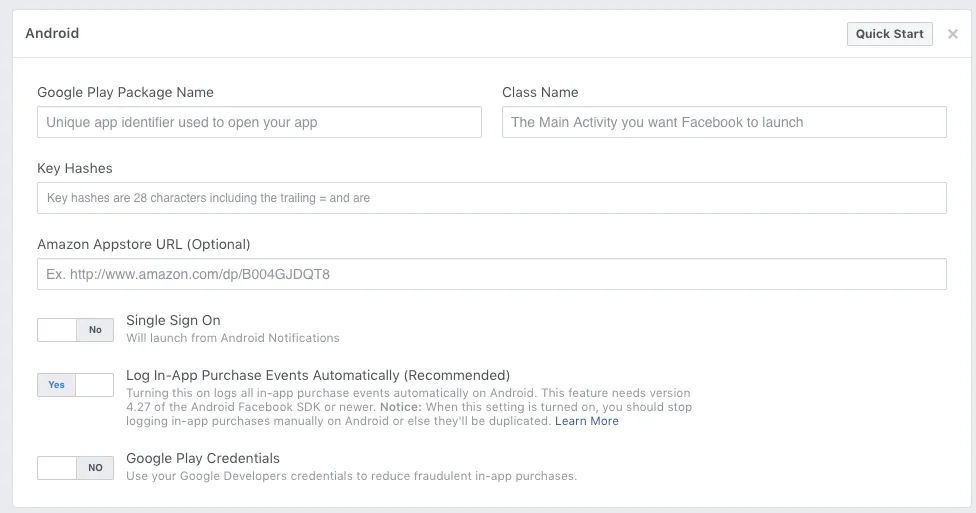
In the Facebook Developers Admin Console for your app, click Settings > Basic > Add Platform and select Android. Fill in the prompted fields below:
iOS
In the Facebook Developers Admin Console for your app, click Settings > Basic > Add Platform and select iOS. Fill in the prompted fields below:

Google Native Login
Before you can enable native login, you must install the Apache Cordova Google Plugin into your current project for google native login.
options.apikey = "YOUR API KEY HERE";

//Enable native login if available.

options.googleNative = false;
options.googlewebid=""; // if you set google native login then you must be add your webClientId
You need to set googleNative true to enable the Google Native Login.
Google Configuration for Google Native Login
Android
1. Generate a configuration file here. Once Google Sign-In is enabled, Google will automatically create the necessary credentials in the Developer Console. There is no need to add the generated google-services.json file into your cordova project.
2. In the Google Credentials Manager, select your project name. Then, click Select Credentials from the left panel and copy the Client ID available under web application.

3. Enter the Client ID as cordova plugin add cordova-plugin-googleplus --save --variable REVERSED_CLIENT_ID=myReversedClientID
4. Set the Client ID in your LoginRadius options object.
options.googlewebid="<YOUR_CLIENT_ID>";
iOS
1. To get your iOS REVERSED_CLIENT_ID, generate a configuration file here. This generates a GoogleService-Info.plist.
2. Drag the configuration file into your project's "Resources" folder. The file contains the REVERSED_CLIENT_ID.
3. Copy the CLIENT_ID from the configuration file and set this in your LoginRadius options object
options.googlewebid="";
Make sure your <project>-info.plist generated by PhoneGap has the correct URL scheme.
![]()
Common Error Messages
Keychain Error: Cordova would not trigger a keychain setup in Google. You need to run your PhoneGap app via XCode in order for it to work.
12501 : This is more commonly caused by an incorrect SHA1 being used to set up your project with Google. Make sure that the SHA1 of the build you are testing matches what you used in the Developer's Console.
10 : Make sure that the Client ID you're passing into the plugin (for webClientId) is of type Web Application and not of type Android, iOS, or Other.
Make sure that your Android SDK is completely up-to-date. Also, double check that the SHA1 used in the Developer's Console matches the SHA1 used in PhoneGap when building your app.
VKontakte Native Login
1. Install Apache Cordova Vkontakte Plugin into the existing project.
2. Enable Vkontakte Native Login in the LoginRadius options object.
options.vkontakteNative = true;
options.vkontakteAppId = "<vkontakte-app-id>";
3. Create a VKontakte account.
4. In the VKontakte Developers site, click My Apps > Create an Application.
5. Enter a Title and select "Standalone Application". Copy the Application ID.
6. After filling in the required fields, go to "Settings" and change the "Application status" to "Application on and visible to all".
Finally, follow the platform-specific instructions below:
Android
-
Provide a valid package name of the Android app in which you want to access the VKontakte Native Login.
-
Generate one SHA1 signing certificate fingerprint for your release version and a separate one for your debug version. You can generate the fingerprint using the "keytool" command. Remove all colons and empty spaces. Finally, add them to the "Signing certificate fingerprint for Android" section.
iOS
Copy the Bundle ID of the project and paste it under "App Bundle ID for iOS" section.
If you're unable to build the iOS project in Xcode after installing the VKontakte plugin, the issue may be with Symbolic Linking. In your PhoneGap project navigate to platforms > ios > iOS App Folder > Plugins > cordova-social-vk > VKSdk.framework > Versions > A. Copy the contents of the "A" folder and paste inside VKSdk.framework. Now, delete the "Versions" folder from "VKSdk.framework".
Social Login Custom Scope
Scopes are special permissions related to accessing a user's social account. There are some default scopes needed for accessing user data. But, they can be overridden in special use cases. To use only specific custom scopes and ignore the default scopes, enable the following in the LoginRadius options object:
options.customScopeEnabled = true;
Alternative Language Support
Hooks are supported for customizing forms to handle localization. Further information can be found here.
Demo
The Demo project can be found here. In index.html, enter your apiKey and appName, which can be found in the Admin Console.
var commonOptions = {};
commonOptions.apiKey = "<your loginradius api key>";
commonOptions.appName = "<LoginRadius tenant name>";
commonOptions.hashTemplate = true;
commonOptions.accessTokenResponse = true;
commonOptions.phoneLogin = false;
commonOptions.sott ="<Get_Sott>";
commonOptions.verificationUrl = "https://auth.lrcontent.com/mobile/verification/index.html";
commonOptions.callbackUrl = "DemoApp://";
commonOptions.isMobile =true;
commonOptions.formValidationMessage=true;
var LRObject= new LoginRadiusV2(commonOptions);
Running the demo project should display the following interfaces:

Login

Registration

APIs
Social APIs
A successful login or registration will generate an access token, which can be used to access LoginRadius' APIs. The Social APIs below are provider-specific. Further information on Data Points can be found here.
User Profile API
Fetch the user’s profile data.
<p id="ID"></p>
LoginRadiusSDK.getUserprofile(function (userprofile) {
    document.getElementById('ID').innerHTML = userprofile.ID;
});
Album API
Fetch the user’s photo albums.
<table id="albums"></table>
LoginRadiusSDK.getAlbums(function (data) {
    for(var i=0;i<data.length;i++){
        var row = document.createElement('tr');
        var col_1 = document.createElement('td');
        var col_2 = document.createElement('td');
        col_1.innerHTML = 'Title '+(i+1);
        col_2.innerHTML = data[i]['Title'];
        row.appendChild(col_1);
        row.appendChild(col_2);
        document.getElementById('albums').appendChild(row);
    }
});
Audio API
Load the user’s audio files.
<table id="audios"></table>
LoginRadiusSDK.getAudios(function (data) {
    for(var i=0;i<data.length;i++){
        var row = document.createElement('tr');
        var col_1 = document.createElement('td');
        var col_2 = document.createElement('td');
        col_1.innerHTML = 'Title '+(i+1);
        col_2.innerHTML = data[i]['Title'];
        row.appendChild(col_1);
        row.appendChild(col_2);
        document.getElementById('audios').appendChild(row);
    }
});
Check-In API
Loads the user’s check-in data.
<table id="Checkins"></table>
LoginRadiusSDK.getCheckins(function (data) {
    for(var i=0;i<data.length;i++){
        var row = document.createElement('tr');
        var col_1 = document.createElement('td');
        var col_2 = document.createElement('td');
        col_1.innerHTML = 'PlaceTitle '+(i+1);
        col_2.innerHTML = data[i]['PlaceTitle'];
        row.appendChild(col_1);
        row.appendChild(col_2);
        document.getElementById('Checkins').appendChild(row);
    }
});
Company API
Load the user’s companies they’ve worked for.
<table id="Company"></table>
LoginRadiusSDK.getCompanies(function (data) {
    for(var i=0;i<data.length;i++){
        var row = document.createElement('tr');
        var col_1 = document.createElement('td');
        var col_2 = document.createElement('td');
        col_1.innerHTML = 'Name '+(i+1);
        col_2.innerHTML = data[i]['Name'];
        row.appendChild(col_1);
        row.appendChild(col_2);
        document.getElementById('Company').appendChild(row);
    }
});
Contact API
Load the user’s contacts.
<table id="Contacts"></table>
LoginRadiusSDK.getContacts("0", function (data) {
     for(var i=0;i<data.Data.length;i++){
        var row = document.createElement('tr');
        var col_1 = document.createElement('td');
        var col_2 = document.createElement('td');
        col_1.innerHTML = 'Name '+(i+1);
        col_2.innerHTML = data.Data[i]['Name'];
        row.appendChild(col_1);
        row.appendChild(col_2);
        document.getElementById('Contacts').appendChild(row);
    }
});
Event API
Load the user’s event data.
<table id="Events"></table>
LoginRadiusSDK.getEvents(function (data) {
    for(var i=0;i<data.length;i++){
        var row = document.createElement('tr');
        var col_1 = document.createElement('td');
        var col_2 = document.createElement('td');
        col_1.innerHTML = 'Name '+(i+1);
        col_2.innerHTML = data[i]['Name'];
        row.appendChild(col_1);
        row.appendChild(col_2);
        document.getElementById('Events').appendChild(row);
    }
});
Following API
Load the list of users the user is following.
<table id="Following"></table>
LoginRadiusSDK.getFollowings(function (data) {
    for(var i=0;i<data.length;i++){
        var row = document.createElement('tr');
        var col_1 = document.createElement('td');
        var col_2 = document.createElement('td');
        col_1.innerHTML = 'Name '+(i+1);
        col_2.innerHTML = data[i]['Name'];
        row.appendChild(col_1);
        row.appendChild(col_2);
        document.getElementById('Following').appendChild(row);
    }
});
Group API
Load the user’s groups.
<table id="Group"></table>
LoginRadiusSDK.getGroups(function (data) {
    for(var i=0;i<data.length;i++){
        var row = document.createElement('tr');
        var col_1 = document.createElement('td');
        var col_2 = document.createElement('td');
        col_1.innerHTML = 'Name '+(i+1);
        col_2.innerHTML = data[i]['Name'];
        row.appendChild(col_1);
        row.appendChild(col_2);
        document.getElementById('Group').appendChild(row);
    }
});
Like API
Load the user’s likes.
<table id="Like"></table>
LoginRadiusSDK.getLikes(function (data) {
    for(var i=0;i<data.length;i++){
        var row = document.createElement('tr');
        var col_1 = document.createElement('td');
        var col_2 = document.createElement('td');
        col_1.innerHTML = 'Name '+(i+1);
        col_2.innerHTML = data[i]['Name'];
        row.appendChild(col_1);
        row.appendChild(col_2);
        document.getElementById('Like').appendChild(row);
    }
});
Mention API
Load the user’s mentions.
<table id="Mention"></table>
LoginRadiusSDK.getMentions(function (data) {
    for(var i=0;i<data.length;i++){
        var row = document.createElement('tr');
        var col_1 = document.createElement('td');
        var col_2 = document.createElement('td');
        col_1.innerHTML = 'Text '+(i+1);
        col_2.innerHTML = data[i]['Text'];
        row.appendChild(col_1);
        row.appendChild(col_2);
        document.getElementById('Mention').appendChild(row);
    }
});
Page API
Load the data associated with a user's Pages.
<input type="text" id="pagename" />
var pagename = document.getElementById('pagename').value;
LoginRadiusSDK.getPage(pagename,  function(pageresponse){
alert(JSON.stringify(pageresponse));
});
Message API
Send a Direct Message to a user.
<input type="text" id="receiver" />
<input type="text" id="subject" />
<input type="text" id="message" />
var to = document.getElementById('receiver').value;
var subject = document.getElementById('subject').value;
var message = document.getElementById('message').value;
LoginRadiusSDK.postMessage(to , subject , message,  function( postmessage){
    if(postmessage.isPosted == true){
        alert("Your status has been successfully posted to the given provider.");
    } else {
        alert("There is some error. Please try again");
    }
});
Post API
Load the user’s posts.
<table id="Post"></table>
LoginRadiusSDK.getPosts( function ( data){
    for(var i=0;i<data.length;i++){
        var row = document.createElement('tr');
        var col_1 = document.createElement('td');
        var col_2 = document.createElement('td');
        col_1.innerHTML = 'Message '+(i+1);
        col_2.innerHTML = data[i]['Message'];
        row.appendChild(col_1);
        row.appendChild(col_2);
        document.getElementById('Post').appendChild(row);
    }
});
Photo API
Load the user’s photos from an album.
<table id="Photos"></table>
LoginRadiusSDK.getPhotos("put your albumID",function (data){
    for(var i=0;i<data.length;i++){
        var row = document.createElement('tr');
        var col_1 = document.createElement('td');
        var col_2 = document.createElement('td');
        col_1.innerHTML = 'Name '+(i+1);
        col_2.innerHTML = data[i]['Name'];
        row.appendChild(col_1);
        row.appendChild(col_2);
        document.getElementById('Photos').appendChild(row);
    }
});
Video API
Load the user’s video files.
<table id="Video"></table>
LoginRadiusSDK.getVideos( function ( data){
    for(var i=0;i<data.length;i++){
        var row = document.createElement('tr');
        var col_1 = document.createElement('td');
        var col_2 = document.createElement('td');
        col_1.innerHTML = 'Name '+(i+1);
        col_2.innerHTML = data[i]['Name'];
        row.appendChild(col_1);
        row.appendChild(col_2);
        document.getElementById('Video').appendChild(row);
    }
});
Status API
Loads the user's status updates and posts status updates to the user's profile.
Retrieving a list of status updates.
LoginRadiusSDK.getStatuses( function( data){
    for(var i=0;i<data.length;i++){
        var row = document.createElement('tr');
        var col_1 = document.createElement('td');
        var col_2 = document.createElement('td');
        col_1.innerHTML = 'Status '+(i+1);
        col_2.innerHTML = data[i]['Text'];
        row.appendChild(col_1);
        row.appendChild(col_2);
        document.getElementById('datatable').appendChild(row);
    }
});
Posting a new status update to the user’s profile.
<input type="text" id="title" />
<input type="text" id="url" />
<input type="text" id="imageurl" />
<input type="text" id="status" />
<input type="text" id="caption" />
<input type="text" id="description" />
var status = document.getElementById('status').value;
var title = document.getElementById('title').value;
var url = document.getElementById('url').value;
var imageUrl = document.getElementById('imageurl').value;
var caption = document.getElementById('caption').value;
var description = document.getElementById('description').value;
if(status == "" || status == null) {
    alert("Status cant be null. Please enter some value into the status");
} else {
    LoginRadiusSDK.postStatus(title,url,status,imageurl,caption,description, function(data){
    if(data.isPosted == true){
    alert("Your status has been successfully posted to the given provider.");
    } else {
    alert("There is some error. Please try again");
    }
});
}
Authentication API
This API is used to perform operations on a user account after the user has authenticated himself for the changes to be made. Generally, it is used for front end API calls. Following is the list of methods covered under this API:
Check Email Availability
This API is used to check the email exists or not on your site.
LoginRadiusSDK.checkEmailAvailability("<email>",function(response){
    alert(JSON.stringify(response));
});
Check Username Availability
This API is used to check the username exists or not on your site.
LoginRadiusSDK.checkUserNameAvailability("<username>",function(response){
    alert(JSON.stringify(response));
});
Check Phone Availability
This API is used to check the phone exists or not on your site.
LoginRadiusSDK.checkPhoneNumberAvailability("<phone>",function(response){
    alert(JSON.stringify(response));
});
Validate Access Token
This API is used to check the phone exists or not on your site.
LoginRadiusSDK.validateAccessToken("<access_token>",function(response){
    alert(JSON.stringify(response));
});
Invalidate Access Token
This API is used to check the phone exists or not on your site.
LoginRadiusSDK.invalidateAccessToken("<access_token>",function(response){
    alert(JSON.stringify(response));
});
Resend Verification Email
This API resends the verification email to the user.
LoginRadiusSDK.resendEmailVerification("<email>",function(response){
    alert(JSON.stringify(response));
});
Add Email
This API is used to add additional emails to a user's account.
LoginRadiusSDK.addEmail("<email>","<type>",function(response){
    alert(JSON.stringify(response));
});
Remove Email
This API is used to remove additional emails from a user's account.
LoginRadiusSDK.removeEmail("<email>",function(response){
    alert(JSON.stringify(response));
});
Update Phone
This API is used to update the login Phone Number of users
LoginRadiusSDK.updatePhone("<phone>",function(response){
    alert(JSON.stringify(response));
});
Custom Objects API
These APIs are used to read/write/update/delete custom object information in JSON format for a specific account.
Firstly, initialize the object:
commonOptions.objectName="";
Get a Custom Object
LoginRadiusSDK.getCustomObjects("<access_token>" ,function(response){
   alert(JSON.stringify(response));
});
Create a Custom Object
var payload = new Object();
payload.FirstName = "test";
LoginRadiusSDK.createCustomObject("<access_token>",payload,function(response){
    alert(JSON.stringify(response));
});
Get a Custom Object by ID
LoginRadiusSDK.getCustomObjectById("<access_token>","<objectrecordid>",function(response){
    alert(JSON.stringify(response));
});
Delete a Custom Object
LoginRadiusSDK.deleteCustomObjectById("<access_token>","<objectrecordid>",function(response){
    alert(JSON.stringify(response));
});
Update a Custom Object
var payload = new Object();
payload.FirstName = "test";
LoginRadiusSDK.updateCustomObjectById("<access_token>","<objectrecordid>",payload,function(response){
    alert(JSON.stringify(response));
});